
X4: Making Pages Dynamic
That which is static and repetitive is boring. That which is dynamic and random is confusing. In between lies art. — John A. Locke
Calling JavaScript 'the glue that holds Web pages together' is short and easy to use, but doesn't do justice to what's going on. Glue sets and hardens, but JavaScript is more dynamic than glue. It can create a reaction and make things keep going, like a catalyst. — Brendan Eich
The World Wide Web is a vast, interconnected network of documents that effectively integrates text and media. HTML, the language of Web pages, consists of tags that identify the contents of a page and provide formatting information for the Web browser. However, when used alone, HTML can produce only static pages. This means that HTML documents look the same and behave in the same manner each time they are loaded into a browser.
In 1995, Brendan Eich and his research team at Netscape Communications Corporation developed a simple programming language, JavaScript, for augmenting Web pages and making them dynamic — that is, capable of changing their appearance over time or in response to a user's actions. JavaScript statements are commands that instruct the browser to perform some action within the page, such as changing an image when the mouse moves over it or submitting credit card information to an online retailer when a button is clicked. In this chapter, you will begin augmenting your own Web pages with JavaScript, focusing on simple techniques for enabling user interaction. You will learn to write JavaScript statements that are associated with images and buttons, allowing them to change and update the page when you move the mouse over them or click on them. In subsequent chapters, you will build upon these basic skills, mastering the fundamentals of programming through the development of dynamic Web pages.
Dynamic vs. Static
If you have spent any time surfing the Web, you have no doubt encountered pages that change while you are viewing them, varying their contents and responding to your actions. At commercial sites, banner ads may cycle as you view the site or may react when you move the mouse over them. Similarly, search engines prompt you to enter specific topics on which you want information and then retrieve lists of Web pages related to those topics. These are examples of dynamic pages, in that their behavior changes each time they are loaded or as events occur.
For example, FIGURE 1 below shows two dynamic images. The image on the left displays a question mark, but when you click on it, it changes to a cat. The image on the right shrinks in size when you move the mouse over it, then returns to its original size when the mouse moves out.


FIGURE 1. Two dynamic images.
Although HTML is sufficient for creating static pages — pages in which the content doesn't change — it does not provide capabilities for specifying dynamic behavior. In order for page designers to indicate actions that are to occur within the page, a programming language is needed. A programming language is a language for specifying actions that a computer can carry out (such as changing an image's source or height). JavaScript is a simple programming language designed for a very specific task: adding dynamic features to Web pages. By associating JavaScript statements with HTML elements in a page, that page can be transformed from a static document to a dynamic presentation that acts and reacts to the user.
Dynamic Elements
Any HTML element in a page can be made dynamic. That is, additions can be made to that element to enable it to react to events like a button click or mouse movement. To do so, three things must be added to the element:
IDENTIFIER: An identifier is a name that is given to an element so that it can be the subject of an action. Identifiers are assigned to HTML elements using the id attribute. As its name suggests, an
idattribute specifies a unique identifier by which that element can be located and altered.EVENT HANDLER: An event handler is a special attribute that defines how an element should react to some event. Three commonly used event-handler attributes are
onclick(for when the user clicks on that element),onmouseover(for when the mouse moves over that element) andonmouseout(for when the mouse moves out).JAVASCRIPT STATEMENT: The final piece required to make an element dynamic is a JavaScript statement that carries out the desired action. The most basic JavaScript statement is one that assigns a new value to the attribute of an element. These statements have the general form:
ID.ATTRIBUTE = NEW_VALUE;
The HTML document in EXAMPLE 4.1 puts all three pieces together to define the first dynamic image from FIGURE 1. The img tag contains the attribute id="mysteryImg", enabling it to be addressed by that identifier. The img tag also contains an onclick attribute that specifies how the element is to change when the user clicks on it. The JavaScript statement inside the onclick attribute
mysteryImg.src = 'https://freecsc.com/Images/cat.jpg';
assigns a new Web address to the src attribute of mysteryImg, making it display a cat when the image is clicked on.
EXERCISE 4.1: Confirm that the dynamic image from EXAMPLE 4.1 behaves as described by clicking the "See in Browser" button and clicking on the image. Then, replace the Web address in the onclick attribute so that a different image appears in place of the cat when you click on the img element. You may use an image that you like (an easy choice would be the dog image at 'https://freecsc.com/Images/dog.jpg'.
The HTML document in EXAMPLE 4.2 defines the second dynamic image from FIGURE 1. The img tag contains the attribute id="dogImg", as well as onmouseover and onmouseout attributes. When the mouse moves over the image, its onmouseover event-handler is triggered, resulting in the JavaScript statement
dogImg.height = 100;
being executed. This has the effect of shrinking the image to half its original size. When the mouse moves out, the onmouseout event-handler is triggered, resulting in the JavaScript statement
dogImg.height = 200;
being executed. This has the effect of resetting the image back to its original size.
EXERCISE 4.2: Confirm that the dynamic image from EXAMPLE 4.2 behaves as described by clicking the "See in Browser" button and moving the mouse over and out of the image. Then, modify the JavaScript statements in the img element so that, instead of shrinking, the image doubles in size when the mouse moves over it and returns to its original size when it moves out.
EXERCISE 4.3: Add a new img element to EXAMPLE 4.2 that displays an image of your choice with a height of 200 pixels. When the mouse moves over the image, its source should change to another image of your choice. When the mouse moves out, it should return to the original image.
 Designer Secrets
The name assigned to an id attribute must start with a letter and should consist only of letters and digits. The convention used throughout this book is that identifiers will be descriptive of their purpose, always starting with a lowercase letter and using a capitalized suffix to identify the type of element. For example, vacationImg would be a reasonable identifier for an image element that displays a vacation photo. Likewise, captionP would be a reasonable identifier for a paragraph element that displays a caption.
The order of attributes within an HTML tag is not important. By convention, we will place the id attribute toward the beginning of the tag so that it is easy to locate.
Syntax Errors
While you were completing the exercises above, you most likely committed one or more typing errors. Perhaps you forgot the closing quote on a Web address or misspelled an attribute or identifier name. Such errors in the format of HTML tags or JavaScript statements are known as syntax errors. For the most part, HTML syntax errors are easy to spot and correct; usually, the browser ignores malformed tags and continues with the page. By contrast, when a syntax error occurs in a JavaScript statement, the resulting action fails. For example, an img element with a malformed onmouseover attribute will not result in any action when the mouse moves over it. Since JavaScript syntax errors result in a lack of action, they tend to be trickier to identify than HTML syntax errors.
Fortunately, modern Web browsers provide features that help programmers identify and correct JavaScript syntax errors. When an error occurs in a JavaScript statement, the browser generates an error message that attempts to identify the cause and location of the error. Using Google Chrome, you can view the error message in the JavaScript Console, which is accessible by selecting "Developer" under the "View" menu. In short,
View → Developer → JavaScript Console
Other browsers have similar consoles that can be opened to view error messages (e.g., the Web Console in Firefox, the JavaScript Console in Safari, and the Console in Edge).
The HTML document in EXAMPLE 4.3 displays an image of a cat, with a caption below. The intention is for the height of the image to double when the mouse moves over it, then return to its original size when the mouse moves out. However, there are three syntax errors in the page that cause the desired actions to fail.
EXERCISE 4.4: Click the "See in Browser" button to display this page in a browser window. Confirm that no actions occur within the page when the mouse moves over or out of the image. To identify and fix each error, attempt the mouse actions then check the JavaScript Console for an error message. If a message appears, use the hint and line number to identify the JavaScript syntax error and correct it. Then try again to identify the next error. If an action fails but there is no error message in the JavaScript Console, that means that the error was not in a JavaScript statement, and so must be in the HTML (e.g., a misspelled attribute).
 Common Errors to Avoid
As you learn to create dynamic Web pages with JavaScript, syntax errors are going to happen. Even master programmers make mistakes. The goal is to learn from past mistakes so that you make them less often and can fix them quickly. One good practice is to test often as you develop your page. If you add features one at a time to the page and test each one as you go, then any error that occurs must have been caused by the last feature added. When an error isn't obvious, check the JavaScript Console for help.
Multiple Action Events
In general, an HTML element cannot have duplicate attributes. That is, no attribute can occur more than once in an HTML tag. For example, we saw in Chapter X2 that an element can only have one style attribute. If you want to set more than one style property for the element, you must place them all in the same style attribute, separated by semi-colons (e.g., style="color:white; background-color:olive"). The same restriction holds with event-handler attributes such as onmouseover, onmouseout and onclick. If you want more than one action to take place in response to an event, you must enter the associated JavaScript statements in the same event-handler attribute, separated by semi-colons.
For example, the img element in EXAMPLE 4.4 defines two actions for each of the event handlers. When the mouse moves over the image, the source is changed and the image doubles in size. When the mouse moves out, the source is changed back and the size is restored.
EXERCISE 4.5: Confirm that the dynamic image from EXAMPLE 4.4 behaves as described by clicking the "See in Browser" button and clicking on the image. Then, introduce a JavaScript error in one of the event handlers. For example, you could remove the single quote after DaveRed.jpg in the onmouseover attribute. What happens when you view this modified page in the browser? Do either of the actions work? What error message appears in the JavaScript Console?
You may note that JavaScript assignment statements and HTML attribute assignments have the same basic form. Both utilize the '=' symbol to denote the assignment of a value (on the right-hand side) to an element attribute (on the left-hand side). The value on the right-hand side of an assignment can be a number (such as the height of an image) or text enclosed in quotes (such as a Web address). In programming language terminology, a sequence of characters enclosed in quotes is known as a string literal, or string for short.
Technically, strings in HTML and JavaScript assignments can be enclosed in either single quotes (' ') or double quotes (" "). However, to avoid confusion, we will follow the convention that strings in HTML assignments are enclosed in double quotes, while strings in JavaScript assignments utilize single quotes. Since JavaScript assignments can be embedded in HTML statements (as in onmouseover and onmouseout attributes), single-quoted string literals will often be embedded in double quotes (as shown in EXAMPLE 4.4).
Designer Secrets
Technically, every JavaScript statement should end with a semicolon, although browsers tend to be forgiving if you occasionally omit the semicolons. As there are instances in which missing semicolons can cause confusion or even errors, you should always include a semicolon at the end of every JavaScript statement.
Interaction via Buttons
If you have spent any time surfing the Web, you have no doubt run across buttons — labeled rectangles that you can click on to initiate some action (e.g., submitting credit card information entered in a form). A button is an HTML element that you can embed in a Web page, just as you would an image or a table. The general form of a button element is as follows:
    <button onclick="CODE_TO_EXECUTE_WHEN_BUTTON_IS_CLICKED">
        TEXT_TO_APPEAR_ON_THE_BUTTON
    </button>
Buttons typically utilize the onclick event-handler attribute, which specifies the action to be taken when the button is clicked. As was the case with the onmouseover and onmouseout event handlers, this attribute uses JavaScript statements to define those actions (e.g., changing the src of an img in the page). The text that appears between the opening and closing tags specifies what label is to appear on the button.
For example, the HTML document in EXAMPLE 4.5 contains two button elements. The first button has the label "Show Image". When it is clicked, its JavaScript statement is executed to change the src attribute of the img whose id is mysteryImg, causing it to display a happy face. The second button has the label "Hide Image". When it is clicked, its JavaScript statement is executed to change the src of the img back to the original Web address (displaying a question mark). As a result, you can click on these buttons to reveal and hide the happy face image.
EXERCISE 4.6: Confirm that the page from EXAMPLE 4.5 behaves as described by clicking the "See in Browser" button and clicking on the buttons. Modify the page so that different photos are shown when the buttons are clicked (e.g., a cat photo and a dog photo). Update the labels on the buttons to match your new photos.
EXERCISE 4.7: Add two more buttons to the HTML document from EXAMPLE 4.5. The first button, labeled "Grow", should cause the image to double in size when the button is clicked. The second button, labeled "Shrink", should cause the image to revert to its original size when the button is clicked.
Designer Secrets
You may have noticed that some HTML elements in our example pages have id attributes while others do not. For example, the img element in EXAMPLE 4.5 has an id attribute (assigned to mysteryImg) but the two button elements do not. As a beginning Web developer, you might be unsure of when an id is needed. The important thing to remember is that adding an id attribute to an HTML element enables that element to be dynamic. The img element in EXAMPLE 4.5 is dynamic, as its src is changed at the click of a button. The buttons, however, are static — their attributes are unchanged, and so ids are not needed.
These examples also demonstrate that a dynamic element can be changed in response to direct actions on that element (e.g., a mouseover event on the img in EXAMPLE 4.4 changes its own src and height attributes) as well as indirect actions on other elements (e.g., an onclick event on a button in EXAMPLE 4.5 changes the src of the img element).
Dynamic Text
All the examples we have seen so far have involved changing the attributes of images in a page, in response to a user action (e.g., moving or clicking the mouse). Any HTML element can have its attributes changed as long as it has been assigned an identifier (using the id attribute). This includes text-based elements, such as headings, spans, paragraphs and page divisions. Each of these text-based elements has an attribute named innerHTML, which refers to the contents of that element. By assigning a new string to its innerHTML attribute, the text within a text-based element can be dynamically changed.
The HTML document in EXAMPLE 4.6 shows an example of dynamic text within a page. The paragraph with the id="captionP" initially displays the caption "Move the mouse over the image." When the mouse moves over the image, its onmouseover event-handler attribute is triggered, executing the JavaScript statement
captionP.innerHTML='Thanks, now move it off.';
As a result, the contents of the paragraph are changed to "Thanks, now move it out." When the mouse moves out of the image, the onmouseover event-handler attribute is triggered, executing the JavaScript statement that resets the paragraph contents back to the original caption.
EXERCISE 4.8: Confirm that the page from EXAMPLE 4.6 behaves as described by clicking the "See in Browser" button and moving the mouse over and out of the image. Modify the page so that different text appears in the caption.
Common Errors to Avoid
The spelling of an id or attribute must be exactly right for the browser to identify it in the page. This includes capitalization. In the case of the innerHTML attribute, the first part of the attribute name, inner, must be in all lowercase letters; the second part, HTML, must be in all uppercase.
If you misspell an id (e.g., mysteryimg instead of mysteryImg), a JavaScript error occurs since the browser is unable to find an element with that id to change. If you misspell an attribute name (e.g., innerHTMl instead of innerHTML), this is not considered a JavaScript error. Instead, the JavaScript statement will assign a value to the non-existent attribute as specified, which is then ignored by the browser. As a result, nothing happens in the page.
In addition to the double-quotes vs. single-quotes distinction, HTML and JavaScript strings differ in an important way. As we have seen in numerous HTML documents, an HTML string can be broken across lines (i.e., the opening and closing double quote can appear on separate lines). For example, the onmouseover and onmouseout attributes in EXAMPLE 4.4 have their string values split across two lines. Similarly, the onclick attributes in EXAMPLE 4.5 have their string values split across two lines. In contrast, a JavaScript string cannot span multiple lines. That is, the opening and closing single quotes of a JavaScript string must appear on the same line. For example, the following button would produce a JavaScript error, since the JavaScript string (highlighted in red) spans multiple lines.
    <button onclick="messageP.innerHTML='This JavaScript string is illegal
                            because it is broken across multiple lines.';">
        Click me!
    </button>
If you want to specify a JavaScript string that is too long to fit on one line, the alternative is to break that string into pieces and glue the pieces together using a '+' sign. [The technical term for gluing strings together is concatenation, but we will use the more intuitive gluing.] As long as each piece fits on a single line, the longer message formed by gluing the pieces together can span multiple lines. For example:
    <button onclick="messageP.innerHTML='This collection of JavaScript strings, ' +
                            'glued together with plus signs, is perfectly legal.';">
        Click me!
    </button>
EXAMPLE 4.7 shows an HTML document with a help icon at the bottom. When the mouse moves over the icon, a message appears to the right of the image. Since the displayed message is long, it is broken into pieces so that each piece appears on a separate line. The pieces are glued together to form the entire message. The message is displayed in a paragraph, which is initially invisible since it just contains a space ( ). When the mouse moves off the help icon, the message disappears since the contents of the paragraph are replaced with a space. Note that the side-by-side arrangement of the image and paragraph is accomplished by placing them in the same row of a table.
The message displayed in EXAMPLE 4.7 shows an additional feature that can be useful when displaying dynamic text. As the attribute name suggests, the text assigned to an innerHTML attribute can contain HTML tags. The browser interprets those tags and formats the text accordingly when updating the page. In this example, the company name appears in bold since it is surrounded by <b></b> tags in the text. Similarly, the email address appears italicized, since it is surrounded by <i></i> tags in the text. In addition, a line break appears in the message since the <br> tag appears in the text.
EXERCISE 4.9: Confirm that the page from EXAMPLE 4.7 behaves as described by clicking the "See in Browser" button and moving the mouse over the help icon. Modify the page so that the phone number and web address appear in italics.
Consider what would happen if you attempted to display dynamic text that included an apostrophe. For example:
    <button onclick="messageP.innerHTML='I'm so happy;">
      Click me!
    </button>
Because a single quote is used for apostrophes as well as JavaScript strings, this will cause an error. The apostrophe will be interpreted by the browser as ending the string (as highlighted in red) and will then be confused by the remaining text on the line. Fortunately, there is an easy fix for this. If you place a backslash (\) in front of an apostrophe, the browser will know not to interpret it as a closing single quote and the apostrophe will be displayed as desired. For example, the following button would display the message correctly:
    <button onclick="messageP.innerHTML='I\'m so happy';">
      Click me!
    </button>
EXERCISE 4.10: Modify the page from EXAMPLE 4.7 so that the phrase "We're happy to serve you!" is added at the end of the message.
Designer Secrets
As we saw in Chapters X1 and X2, spans, paragraphs, and page divisions are all groupings of text within a page. A span is commonly used when you want to format a small portion of text (say a word or phrase within a sentence that is to be colored red). A paragraph groups together sentences, with a blank line before and after to separate it from other elements in the page. A page division is a larger grouping of paragraphs and/or other elements that is commonly used to format them as a unit (such as grouping an image and several paragraphs together in a centered page division). All three of these elements have an innerHTML attribute that specifies their contents, so all three can display dynamic text.
Common Errors to Avoid
Any attribute of a dynamic element can be changed using an event-handler attribute. This includes the style attribute that determines how an element is formatted in the page. For example,
    <p id="dynaP" onclick="dynaP.style='color:red';">
        This paragraph will change color when clicked.
    </p>
However, reassigning the style attribute as a unit can have unintended consequences. Suppose, for example, that the body element set the default font for all text in the page using its style attribute. This inherited property would be lost when the paragraph has its style attribute reassigned. If you want to reassign a property without overriding others, this can be accomplished by specifying ELEMENT_ID.style.PROPERTY in the assignment. For example,
    <p id="dynaP" onclick="dynaP.style.color='red';">
        This paragraph will change color but leave other properties unchanged.
    </p>
Putting It All Together
This chapter introduced concepts and techniques for creating dynamic Web pages, from images that change when the mouse moves over them, to buttons that alter the background color of a page when clicked, and even text that can appear and disappear as a result of mouse actions. As an example that puts many of these dynamic elements together, consider the task of creating a vacation photo gallery (FIGURE 2).
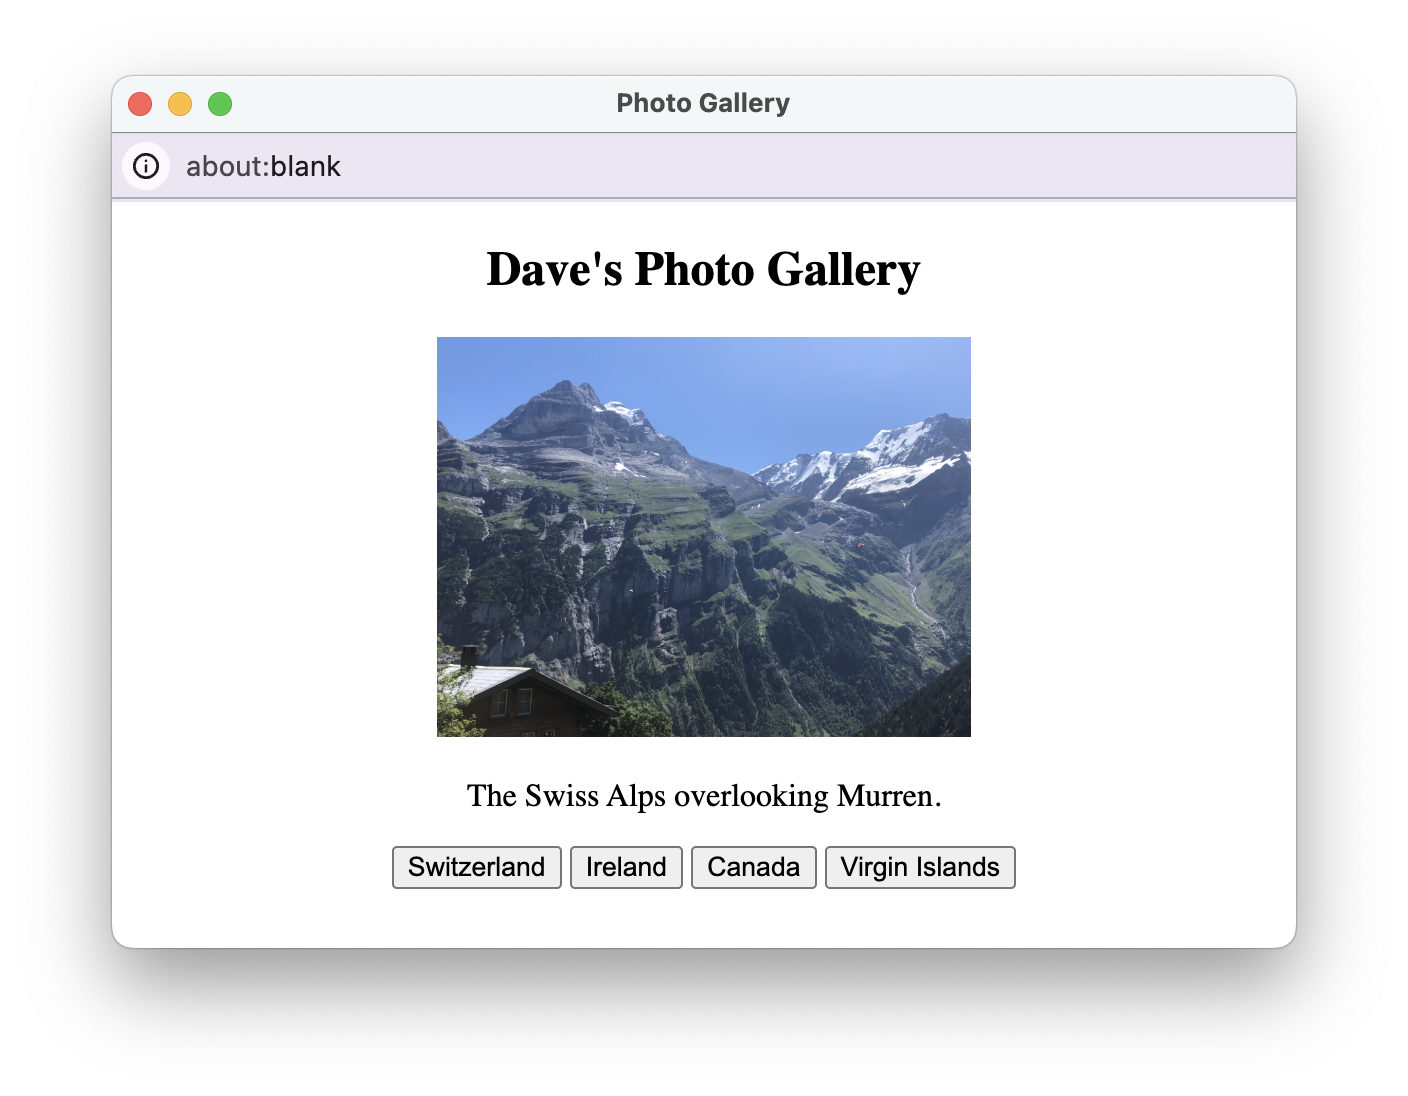
FIGURE 2. Photo Gallery Page.
This page displays a single image, showing a vacation photo with a caption describing that photo. When the page loads, the image shows a scene from Switzerland with the caption "The Swiss Alps overlooking Murren." The image and caption can be changed, however, by clicking one of the buttons at the bottom. For example, clicking on the Ireland button changes the photo to a scene from Ireland and updates the caption accordingly. An additional feature of the page is that you can zoom in on the photo using the mouse. The image doubles in size when the mouse moves over the image and returns to its original size when the mouse moves out.
The HTML document in EXAMPLE 4.8 implements this page.
There are several details to note about this document and how it implements the desired appearance and behavior of the page.
- All the elements in the page are centered horizontally. This is accomplished by having the attribute
style="text-align:center"in the openingbodytag. - Since the
imgelement is to behave dynamically (resizing when the mouse moves over and out and changing itssrcwhen a button is clicked), it has been given an identifier via the attributeid="galleryImg". Similarly, the paragraph that contains the caption is to be dynamic, changing its text when a button is clicked. It has been given an identifier via the attributeid="captionP". - The
imgelement has two event-handler attributes defined, each with a JavaScript statement to carry out the desired action. Theonmouseoverstatement assigns theheightattribute of thegalleryImgto 400 pixels (doubling its size). Theonmouseoverstatement reassigns theheightattribute of thegalleryImgback to the original 200 pixels. - Each of the
buttonelements has anonclickattribute with two JavaScript statements, one for assigning thesrcattribute of thegalleryImgelement (effectively changing the photo) and the other for assigning theinnerHTMLattribute of thecaptionPelement (effectively changing the caption).
Chapter Summary
- JavaScript is a simple programming language for making dynamic Web pages. Using JavaScript, Web designers can create pages that interact with the user and vary their contents each time they are loaded.
- A JavaScript statement is an instruction that tells the browser to perform some specific action, such changing an element's attribute.
- An
idattribute can be added to any HTML element to make that element dynamic. Capitalization matters, socaptionPandcaptionpare considered two distinctids by the browser. - An event handler is an HTML attribute that specifies how the element is to react to certain events. JavaScript statement(s) are assigned to an event handler to define the specific action to be carried out.
- The
onmouseoverevent handler specifies how an element is to react when the user moves the mouse over the element. Similarly, theonmouseoutevent handler specifies how the element reacts when the mouse is subsequently moved off the element. The general form for an image that reacts to mouse movement is:<img id="ELEMENT_ID" src="ADDRESS_OF_IMAGE" alt="ALTERNATE_TEXT" onmouseover="CODE_TO_EXECUTE_WHEN_MOUSE_GOES_OVER_IMAGE" onmouseout="CODE_TO_EXECUTE_WHEN_MOUSE_GOES_OUT"> - A JavaScript assignment statement is used to assign a new value to an attribute of an element. The general form of a JavaScript assignment is:
ELEMENT_ID.ATTRIBUTE_NAME = NEW_ATTRIBUTE_VALUE;
- If more than one action is to take place when an event occurs, more than one JavaScript statement can be listed in the event-handler attribute. Each statement must end with a semi-colon.
- A sequence of characters enclosed in quotes is known as a string literal, or string for short. By convention, HTML strings use double quotes while JavaScript string use single quotes.
- An error in the format of an HTML tag or JavaScript statement (e.g., a misspelled identifier name) is known as a syntax error. Syntax errors in HTML tags are typically ignored by the browser; syntax errors in JavaScript statements will typically cause the page to fail to load.
- A button is an HTML element that initiates actions in the page when clicked (using the
onclickevent-handler attribute). The general form for a button is:<button onclick="CODE_TO_EXECUTE_WHEN_MOUSE_CLICKS_ON_BUTTON"> BUTTON_LABEL_TEXT </button> - Text-based elements, such as spans, paragraphs and page divisions, have an
innerHTMLattribute that defines their contents. By assigning a new string to theinnerHTMLattribute of a text-based element, that string can be dynamically inserted into the page. - The string assigned to an
innerHTMLattribute can contain HTML tags for formatting the text. To embed an apostrophe inside a JavaScript string, precede the apostrophe with a backslash, e.g.,messageP.innerHTML='I\'m <i>glad</i> you are here!';
Projects
All projects should follow the basic design guidelines described in this and the previous chapters. These include:
- When an element is assigned an
id, the name chosen should be descriptive (i.e., suggest the purpose of the element). - Similarly, the label on a button should clearly describe the action that will occur when the button is clicked.
- If dynamic text is to appear next to an image (as opposed to above or below it), a table should be used to arrange them in a row.
- If a long message is to be dynamically displayed in a page, the JavaScript string denoting that message should be broken into pieces and glued together so that each piece fits on a line.
PROJECT 4.A: Download a copy of the HTML document in EXAMPLE 4.8 (by clicking on the Download link) and save it on your computer under the name gallery.html. Using a text editor of your choice, make the following modifications/additions to your document:
- After the name "Dave Reed" in the meta tag, add "(modified by X)", where X is your name.
- Change the top-level heading so that it includes your name instead of "Dave".
- Store four image files of your choice in the same folder as your Web page. These could be photos you have taken or image files you downloaded from the Web. Modify the page to display these local images along with descriptive captions. Reminder: the image files should be no larger than 500KB.
PROJECT 4.B: Consider the task of designing a Web page for displaying quotations. The page should contain images of famous authors. When you click on an author image, a quotation by that author should appear at the bottom of the page. For example,
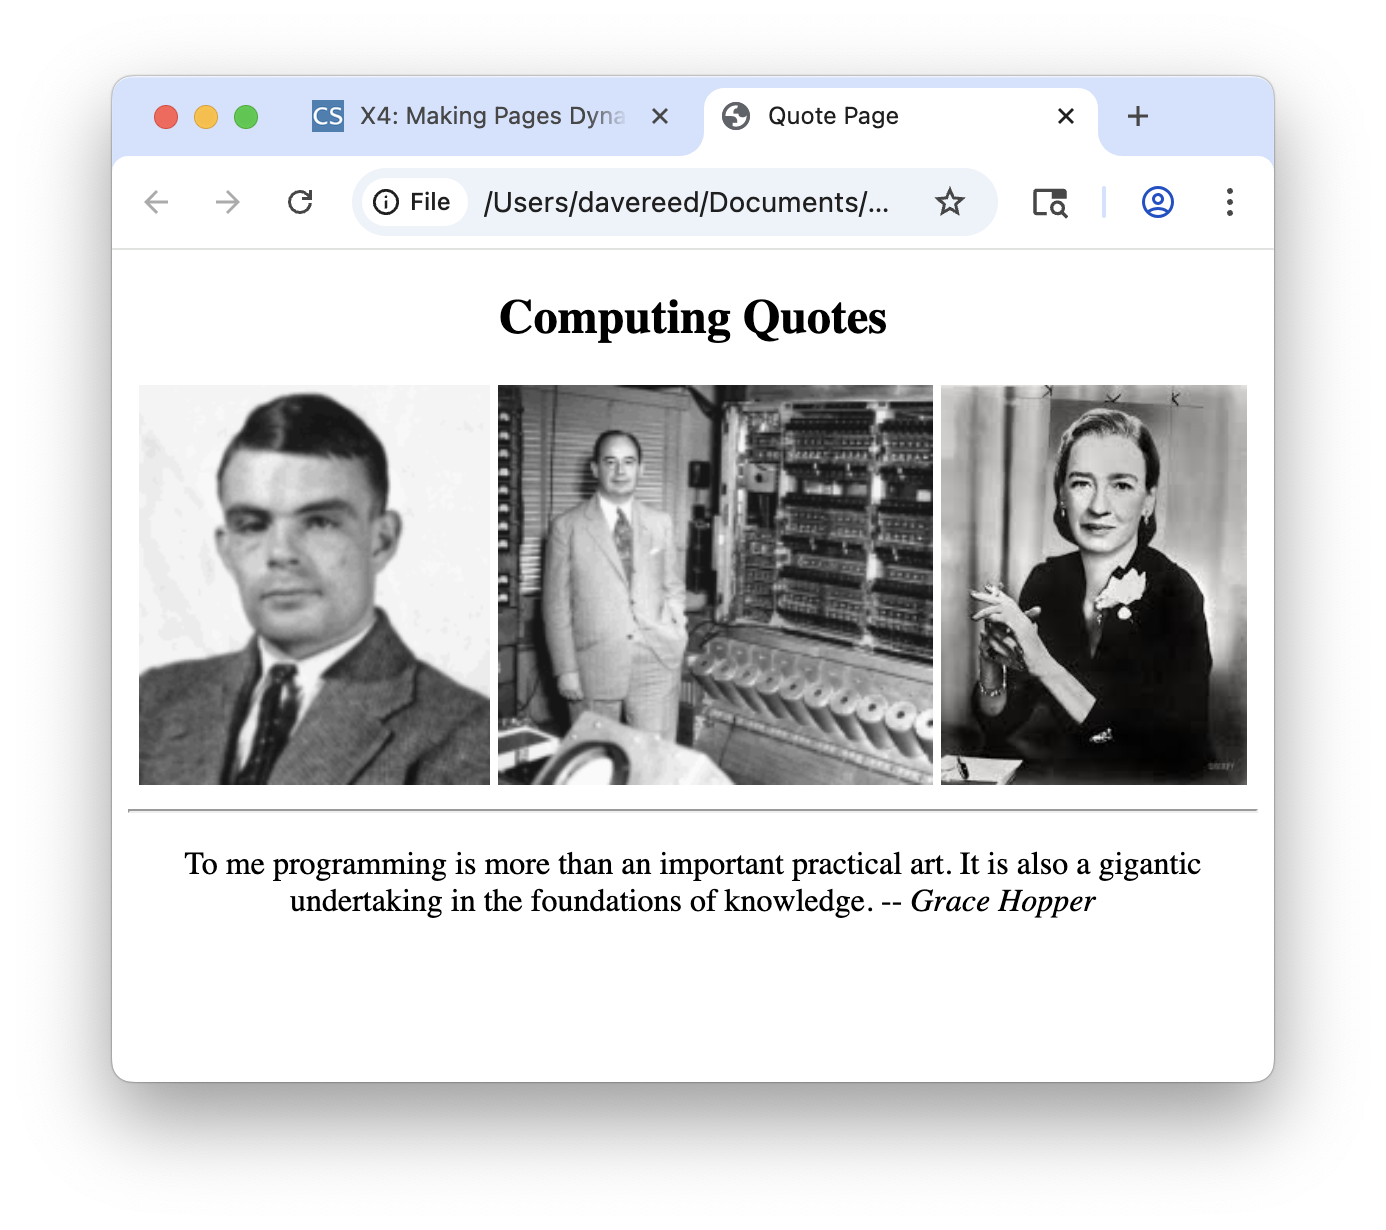
Create a Web page named quotes1.html that completes this task. Your page should have the following features:
- All elements in the page should be centered horizontally.
- There should be a top-level heading at the top of the page, with at least three images below the heading. These images should display photos of famous people, although the choice of people is up to you. There should be a horizontal line below the images, with a paragraph underneath (initially empty) for displaying the quotations.
- When you click on an author image, a quotation from that author should appear in the paragraph at the bottom of the page. The quotation should end with the author's name in italics.
PROJECT 4.C: Create a Web page named quotes2.html that is a simple variant of the quotes1.html from PROJECT 4.B. The page should look the same, but instead of responding to mouse clicks, the img elements should respond to the mouse moving over and out.
- All elements in the page should be centered horizontally.
- There should be a top-level heading at the top of the page, with at least three images below the heading. These images should display photos of famous people, although the choice of people is up to you. There should be a horizontal line below the images, with a paragraph underneath (initially empty) for displaying the quotations.
- When you move the mouse over an author image, a quotation from that author should appear in the paragraph at the bottom of the page. The quotation should end with the author's name in italics. When the mouse moves out of the image, the quotation should disappear (i.e., be replaced with a space).
PROJECT 4.D: Create a Web page named guess.html that shows you pictures of people and asks you to guess who each person is. The pictures should be centered horizontally as shown below:
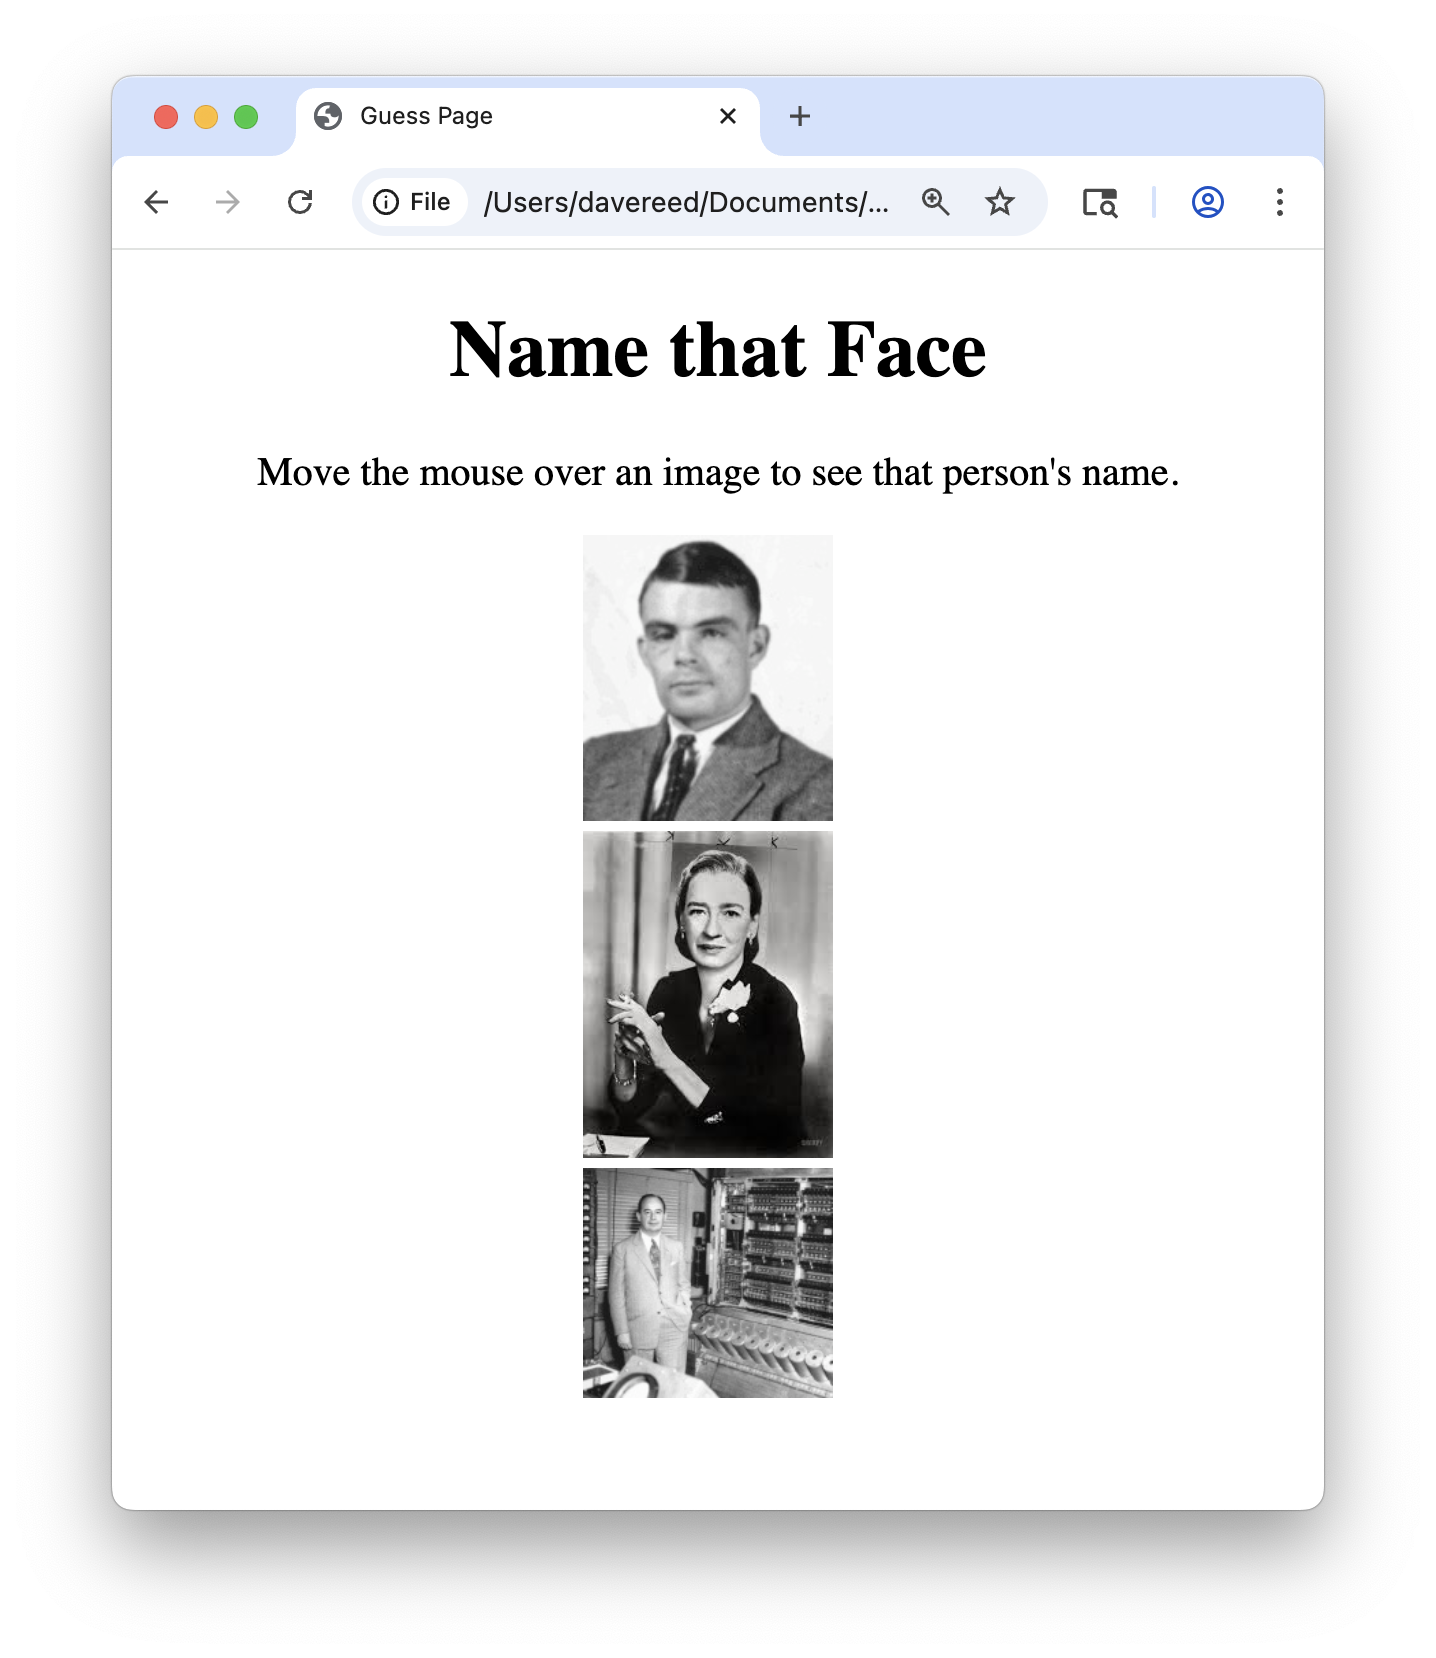
When the mouse moves over an image, that person's name should appear next to their picture, in large red letters.
- All elements in the page should be centered horizontally.
- There should be a top-level heading at the top of the page, with at least three images below the heading. These images should display photos of famous people, although the choice of people is up to you.
- When you move the mouse over an image, that person's name should appear next to their photo, in large red letters. When the mouse moves out of the image, the name should disappear (i.e., be replaced with a space).